…no one notices it until it’s missing.
As we move to our new host environment, the UTC Web Team is evaluating file storage and making some adjustments and recommendations. Storing large files directly on a website consume valuable server space and can dramatically slow down page load times, leading to a poor user experience and lower search engine rankings. They also increase the risk of timeouts and errors, particularly for users on mobile devices or with limited bandwidth. From a long-term perspective, large files make site backups and migrations more cumbersome and can contribute to higher hosting costs. Keeping file sizes lean and storing bulky content in appropriate external platforms helps ensure your website stays fast, efficient, and easy to manage. Here are some tips for managing your files:
Images
- When using Photoshelter, please download images at either the Medium (1200px) or Small (600px) size for uploading to the main site’s media library.

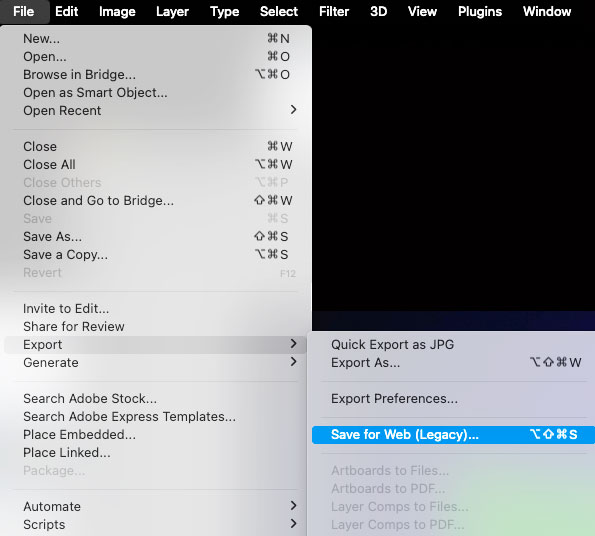
- For Adobe Photoshop, ensure your images are 72 dpi and no larger than 1200px in width. To optimize them for the web, go to File > Export > Save for Web (Legacy). In the dialog window, select “High” quality. This will balance image quality with faster load times for the web.
Don’t have any Adobe applications? As a UTC employee, you can request Adobe Creative Cloud applications here.
PDF Files
Optimizing your PDF helps reduce file size, improve load time, and ensure better accessibility. To optimize a PDF, remove unnecessary images or compress them, limit embedded fonts, and reduce the overall file size using export or compression tools. Additionally, make sure the PDF is accessible by tagging headings, adding alt text to images, and using clear document structure. A well-optimized PDF not only loads faster but also improves usability, searchability, and compliance with accessibility standards. Follow these steps to make your PDF web-ready:
Step 1: Open Your PDF
- Launch Adobe Acrobat Pro.
- Open the PDF file you want to optimize.
Step 2: Use the PDF Optimizer Tool
- Click File > Save as Other > Optimized PDF.
- This opens the PDF Optimizer window.
Step 3: Choose What to Optimize
- In the PDF Optimizer window, you can control compression and remove unnecessary data:
- Images: Downsample and compress images (e.g., use JPEG or JPEG2000 for better compression).
- Fonts: Unembed unused fonts.
- Discard Objects: Remove unnecessary elements like form fields or annotations if not needed.
- Discard User Data: Remove hidden data like metadata, comments, or file attachments.
- Clean Up: Optimize structure and remove unused elements.
Step 4: Audit File Size (Optional)
- Click Audit space usage (bottom left of the Optimizer window) to see what’s taking up space in the file. This helps identify the biggest contributors to file size.
Step 5: Check Accessibility
For accessibility, use Tools > Accessibility > Full Check to identify any issues before uploading.
Step 6: Save Your Optimized PDF
- Click OK to apply your optimization settings.
- Save the file with a new name (e.g., “filename_optimized.pdf”) to preserve your original.
