Creating a WordPress post is a simple yet powerful way to share content on your website. Whether you’re publishing news, updates, blog entries, or announcements, WordPress provides an intuitive editor that makes it easy to format text, add images, embed media, and more. This guide will walk you through the basics of creating a new post—from logging in to hitting “publish”—so you can communicate effectively with your audience and keep your site fresh and engaging.
Getting Started

- Scroll to the bottom of the page and log in through the CAS login, using your MocID and password.
- At the top of your screen, hover over the “+ New” button link to reveal your options in the dropdown menu and click on “Post”

WordPress Infrastructure
The WordPress interface uses a system of blocks to build a page and is called the Block Editor (as opposed to the older “Classic Editor”). Each headline, paragraph, image, gallery, graphical elements, etc. are all created as separate blocks. This modular interface gives you the ability to edit, add, move, delete your content much more easily than before without having to know code. It looks like this:
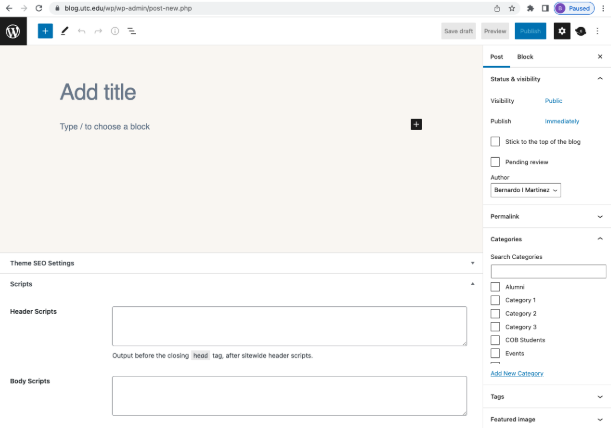
Here is a brief breakdown of each of the main areas available:
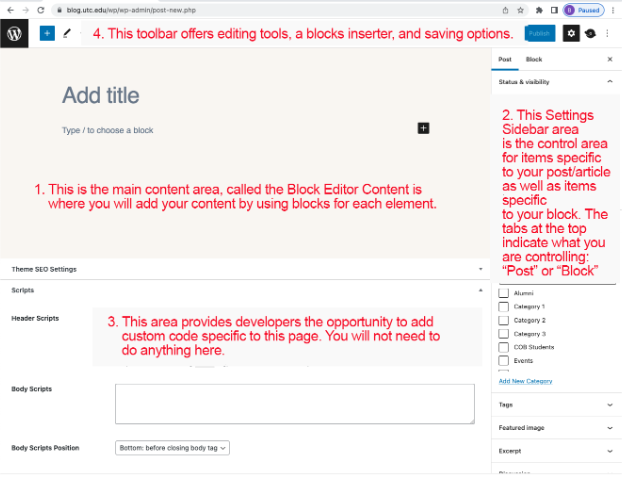
- Main Content Area
Main content area, called the Block Editor Content, is where you will actually put your content. - The Settings Sidebar
The Settings Sidebar, is what gives you control about how the “Post” or the “Block” behaves. You select which you desire to alter by clicking on either the “Post” tab or “Block” tab at the top of the sidebar.
- Most default post options will be satisfactory and not need altering. The items you will need to know about most are as follows:
- Permalink (automatically generated): This is the link that will be created upon saving this post. You will need this link for your e-newsletter teaser’s “Read More” that links to this article.
- Categories (required): Your selection of this will determine where this article can be found in the main navigational menu and this blog’s archives.
- Tags (optional): These are terms specific to your article that people can use search words to find this article.
- Feature image (optional): This is the image that will be associated with your article.
- AddToAny(optional): This shows options for the user to share this article.
- Default Block options should be satisfactory and not need altering.
- The Developer Region
This area provides the opportunity for web developers to add custom code specific to this page. You will not need to do anything there. - The Toolbar
The Toolbar allows you to do the following:
- Insert a specific kind of block.
- Select the type of editor you want.
- Undo and RedoFind out the details of your document such as word count.
- Provide a list view of your current blocks
- Provide a variety of layout options. (NOTE: We recommend using the defaults to prevent layout breakage.)
- Save a draft.
- Preview your article
- Publish your article.
- Other buttons we recommend NOT using, but rather allowing the defaults to set the page.
- Settings (the gear)
- Genesis (the Saturnesque icon)
- View (the three stacked dots to the far right). There is a “Help” and “Welcome Guide” that you may want to access for information about the new block editor.
Adding Content
- Add a title of the article
Click where it says “Add Title” and manually type in the title of the article. Usually, the subject line from ListServ will suffice as the title.
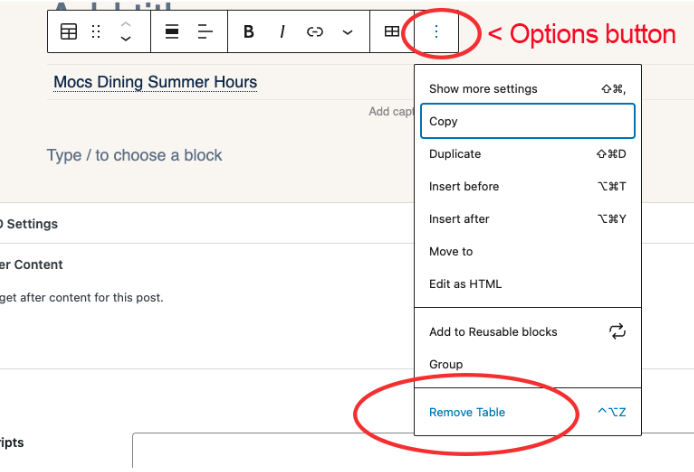
NOTE: Copy and pasting the subject line from ListServ will include the table format from ListServ, thus adding a table bloc and not adding it to the Title bar. Should this happen, you can click the table block in error, showing a new modular toolbar above the block. Click on the Options button (the far right with three dots stacked) and go down to “Remove Table”. Manually type in the title.
- Adding copy
The paragraph icon is the default block to add copy. Alternatively, you can add the body copy by choosing the paragraph symbol. - Adding an image
If you have an image to add, you can add it as an image block. Simple click below the last paragraph you added. Click on the + button. In the search field, type in “image” and click on the image icon

- The block will be placed but we need to upload the image itself. Click “upload”.
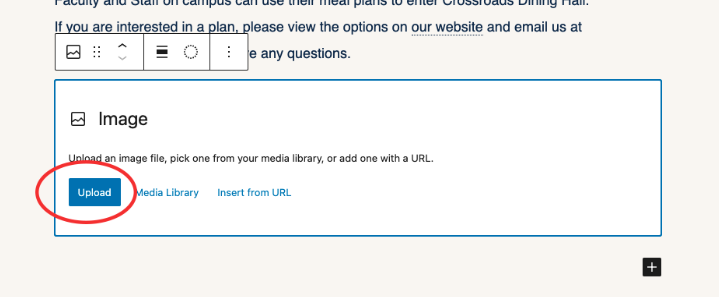
- Your computer’s file tree should show. Navigate to and click on the image file you saved to your desktop. Click “Open”. Your image will be placed in your image block.
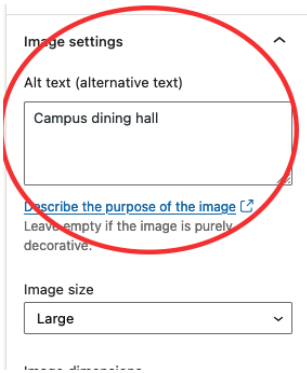
- In the sidebar, you should have the “Block” tab selected. Under “Block” there is a field called “Alt text”. This is crucial to fill out for accessibility for those users who are visually impaired as this is what their screenreaders will read to them to describe the image. Fill this out with a brief description of the image, then click the “Set featured image” button at the bottom.

- You can leave the other settings to default.
- If you want to move the image block up to under the title, click on the image block to highlight it, the click the up arrow to move to where you’d like it.
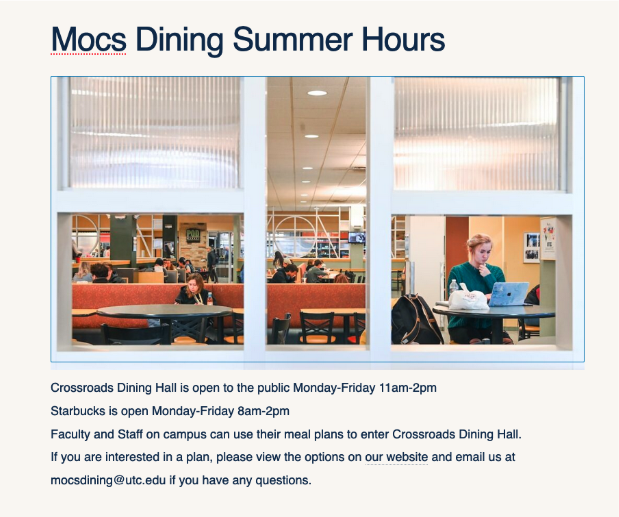
Before:

After:
- Important Sidebar Items: POST
There are two tabs at the top of the sidebar: “Post” and “Block”. You will be mostly working with the “Post” tab. These items pertain specifically to the post you are creating. The “Block” tab pertains to the individual blocks you use within this post.
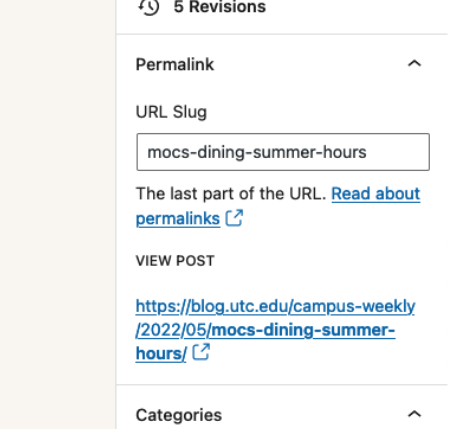
- Permalink
Once you have finished creating this post, WordPress will assign a “permalink” to it based off the Campus Weekly site’s URL plus the title you give this post. The link found under “VIEW POST” is the link you will need to use in the e-newletter’s “Read More”
- Categories
Categories are important as they are what will show when a user navigates with the main menu to find the ListServ article pertinent to them. The categories are as follows:
- Campus (UTCNEWS ListServ item)
- Faculty/Staff (UTCINFO ListServ item)
- Student (SCRAPPY ListServ Item)
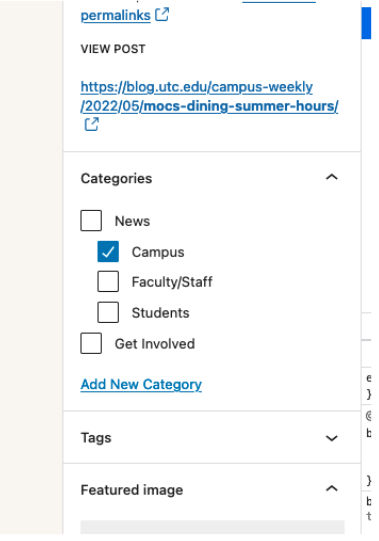
- Tags
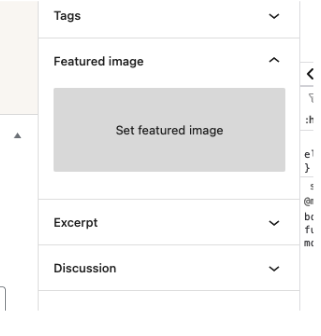
This is where you would add key words in the article that would help a user find the article. This is optional. - Feature Images
Feature images are optional. These are the images that show with the article’s teasers on the front page or on an archive page. It looks like this:

If you’ve worked with Feature Images in the Classic Editor before, it works the same way in the Block Editor. NOTE: There is a bug that is being diagnosed. Currently, you can set a feature image, but removing an existing one is not working at this time. Once set, the feature image will remain. It can be changed, but it cannot be removed.
- In the Block Editor the sidebar, click on Set Feature Image.
- You will be taken to the Media Library where there are two tabs at the top: “Upload Files” and “Media Library”, where you can upload a new image or apply an existing one in the library respectively.

- To upload, click on the “Upload files” tab and simply drag your image(s) from your computer and drop them into the “Drop” field or click on “Select Files” and navigate to your image on your computer. It will automatically be added to the library and take you there. Just as with the images placed within the story, you will need to add an “Alt text” description of the image for accessibility.
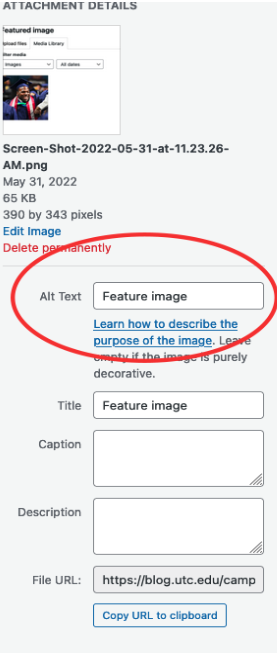
- To select an existing media image, simply go to the Media Library to choose your image. Please ensure that the “Alt text” is set for accessibility. Select “Set featured image.
- Excerpt
This is optional. This is the teaser information found on the homepage as well as archives and search pages. This is optional and will populate automatically. - Discussion
You can allow users to comment by checking “Allow comments”. Probably not necessary for this blog. We do NOT recommend checking “Allow pingbacks and trackbacks”. Pingbacks and trackbacks are technologies that notify other websites when content has been published that their users might find interesting. - Add to Any
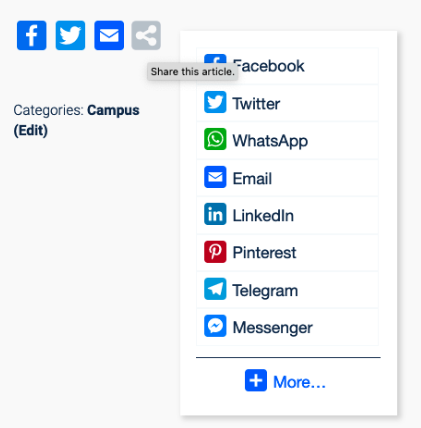
We DO recommend checking “Show sharing buttons”. Checking this will result in this showing at the bottom of your post:
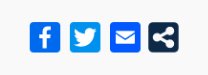
When a use hovers over the “Share” icon, they will see this:
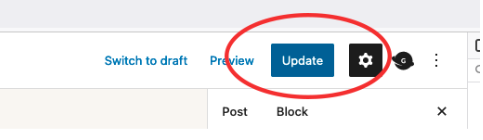
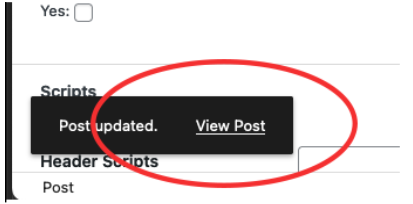
- Update and View
At this point you should be good to go live. You can click the “Update” at the top, then click the “View page” link in a black box to the bottom left to see the page you just created.
- Edit
If you find you need to edit the page, there are two ways you can do this:
- Navigate to the page and either click “Edit page” in the black bar at the top of the page or the “Edit” link found at the bottom of the page under the Category.
- In the CMS side, you can hover over “Posts” and click on “All posts” in the left sidebar menu, locate your article in the list. Hover over your article to reveal your options and click on “Edit”.
- Save your page
After editing your page, repeat step 5, “Update and View”.
You’re done!